

The French manicure is one of the most requested and most imitated nail looks in history. It appears simple, a natural base with a clean white tip, but executing it well requires understanding the technique. This complete guide walks through every approach from beginner-friendly nail guides to professional freehand technique.
Understanding the French Manicure
A traditional French manicure features a sheer pink or nude base that mimics the natural nail colour, topped with a precise white band at the free edge. Modern variations include coloured tips, reversed French (coloured base with neutral tip), and gel versions.
The classic remains the most versatile, it suits every occasion, finger shape, and personal style. Preparing healthy skin and removing old beauty products correctly is just as important as perfect nails, so it’s worth learning How to Remove Makeup Properly as part of your overall beauty routine.
Products You Will Need
• Base coat, protects nails and improves adhesion
• Sheer pink or nude nail polish, the base
• White nail polish (opaque), the tip
• Clear top coat
• French manicure guides or striping tape
• Small nail art brush + acetone, for clean-up
• Cuticle oil, final step
Method 1: Using French Manicure Guides (Easiest)
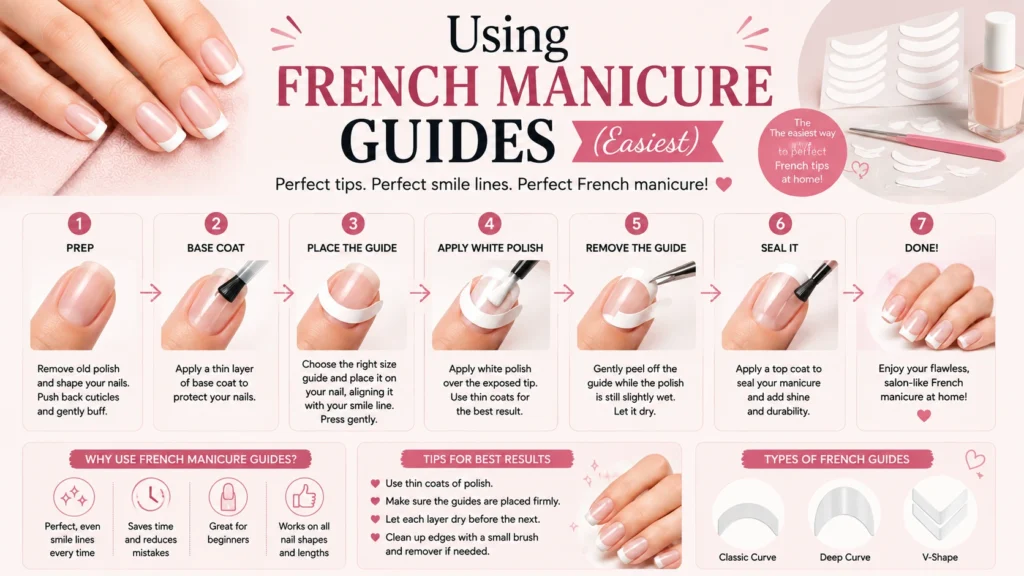
Step 1, Prepare Nails
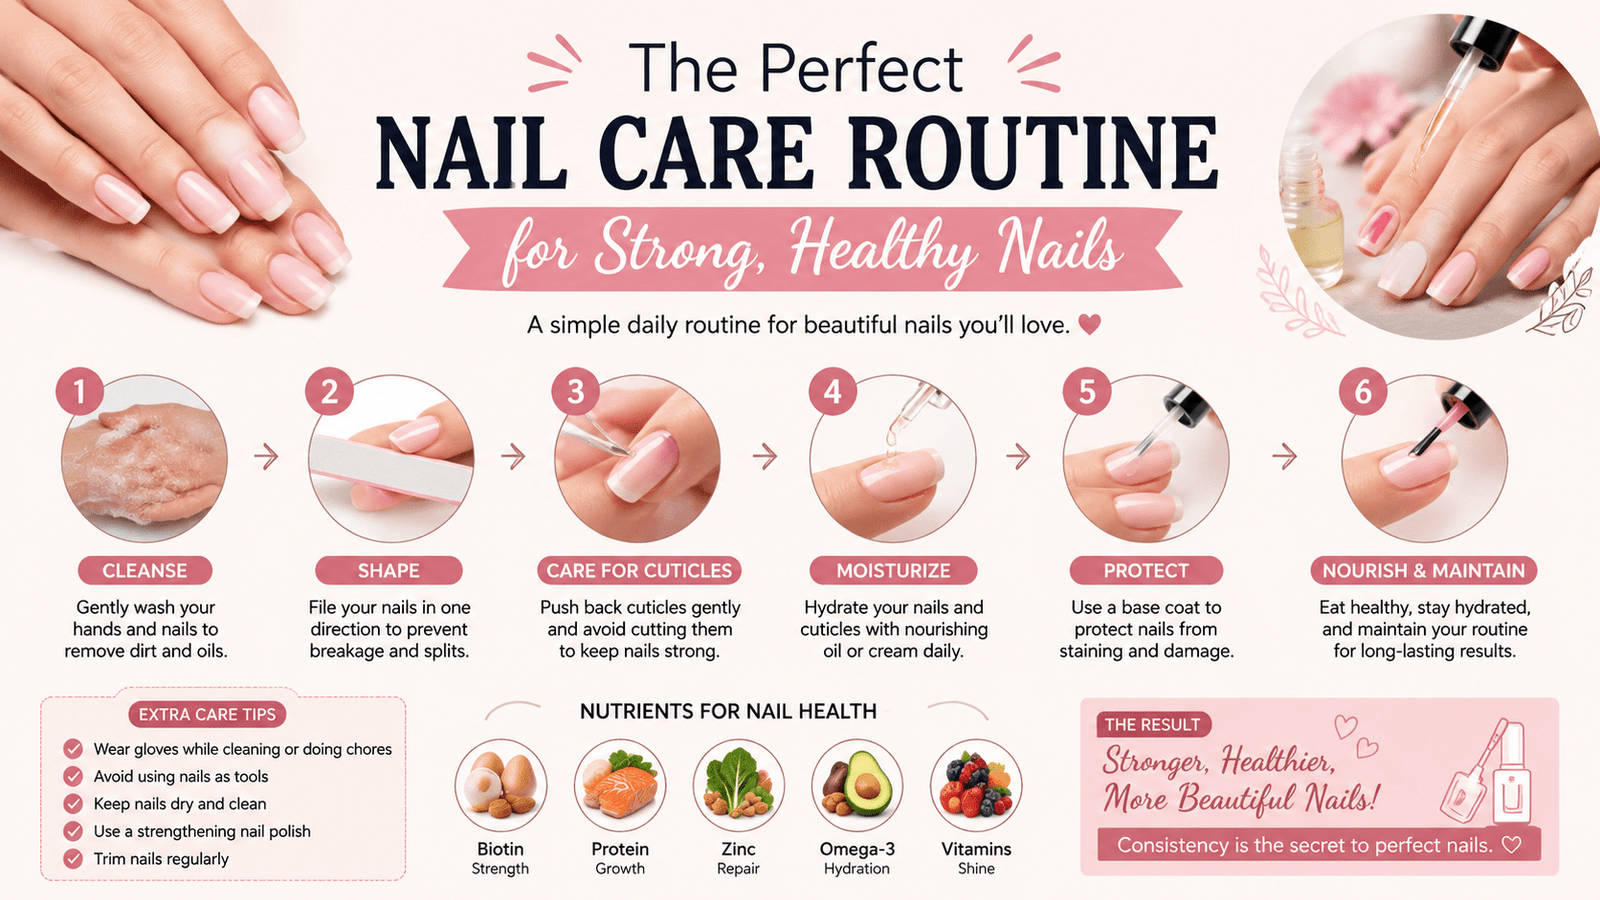
File nails to your preferred shape and length. Buff lightly to smooth the surface. Apply cuticle oil and push back cuticles. Wipe nails with alcohol to remove all oil before applying any polish. A smooth beauty routine starts with healthy skin too, and these Professional Makeup Tips Before Makeup can help you create the perfect base before applying any cosmetics.
Step 2, Apply Base Coat
Apply a thin, even base coat to all nails and allow to dry completely (2–3 minutes minimum).
Step 3, Apply Nude or Pink Base
Apply one or two thin coats of your sheer pink or nude polish. If your skin tends to feel dry while getting ready, following these Expert Makeup Tips for Dry Skin can help create a more hydrated and radiant overall look. The base should be natural-looking, close to your skin tone. Allow each coat to dry before adding the next. Allow the final coat 3–5 minutes drying time before the next step.
Step 4, Place the Guides
Press a French manicure guide sticker just below where you want the white tip to begin. The guide should follow the natural smile line of your nail. Press firmly along the lower edge of the guide to prevent polish seeping under it.
Step 5, Apply White Polish
Apply white polish above the guide, starting from one side and pulling across to the other in one or two strokes. Do not overload the brush, a loaded brush causes flooding and bleeds under the guide. Two thin coats give better results than one thick coat.
Step 6, Remove Guide and Clean Up
Remove the guide while the white polish is still slightly wet, waiting until it is fully dry causes cracking. Use a small nail art brush dipped in acetone to clean any imperfections along the smile line. Dip, dab, and wipe rather than dragging across the line.
Step 7, Apply Top Coat
Seal with a glossy top coat over the entire nail, including the tip edge, this ‘capping’ of the tip is essential for preventing chipping. Apply a fresh layer of top coat every 2–3 days to maintain the finish and extend wear.
Method 2: Freehand French Tips (Intermediate)
Working freehand produces the most natural result because you can follow the unique smile line of each nail, which varies slightly from finger to finger.
56. Apply base coat and two coats of nude base as above
57. Load the white polish brush with a moderate amount of product
58. Rest the side of your brush hand on a flat surface for stability
59. Start at one outer corner of the nail tip
60. Pull the brush across in a smooth, confident arc following the natural smile line
61. Correct imperfections immediately with an acetone brush
62. Two thin coats of white as needed
63. Seal with top coat, capping the edge
Modern French Manicure Variations
Coloured Tips
Replace white with any colour, pastel pink, baby blue, sage green, or even black for a bold reverse look. All technique steps remain the same. Beauty lovers with combination or oily skin can also improve their complete routine by following the Best Makeup Routine for Oily Skin for longer-lasting makeup throughout the day.
Gel French Manicure
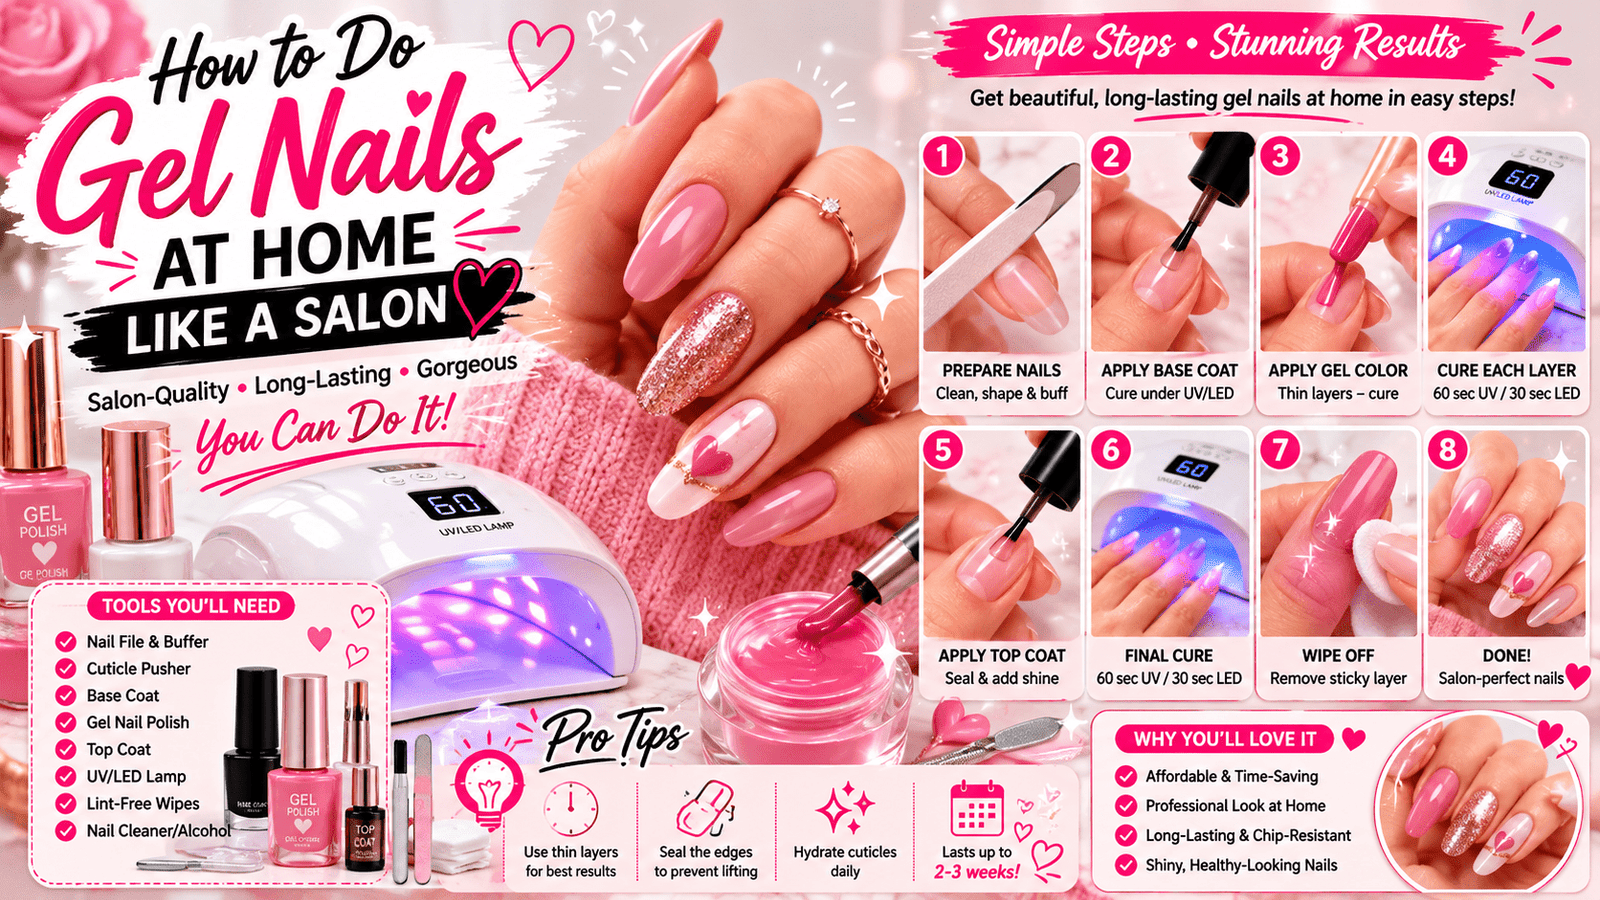
Apply gel base coat and cure. Apply sheer gel nude and cure. Apply white gel using guides or freehand and cure. Apply gel top coat and cure. Wipe inhibition layer. The gel version lasts 2–3 weeks without chipping.
Ombre French Tips
Create a subtle gradient between the base and the tip by sponging the white shade at the tip and blending downward with a makeup sponge before sealing. A modern, softer version of the classic.
Reverse French
Apply a bold or metallic shade at the base of the nail (near the cuticle) rather than the tip. Use the same guide technique but placed at the nail base. A contemporary editorial take on the classic.
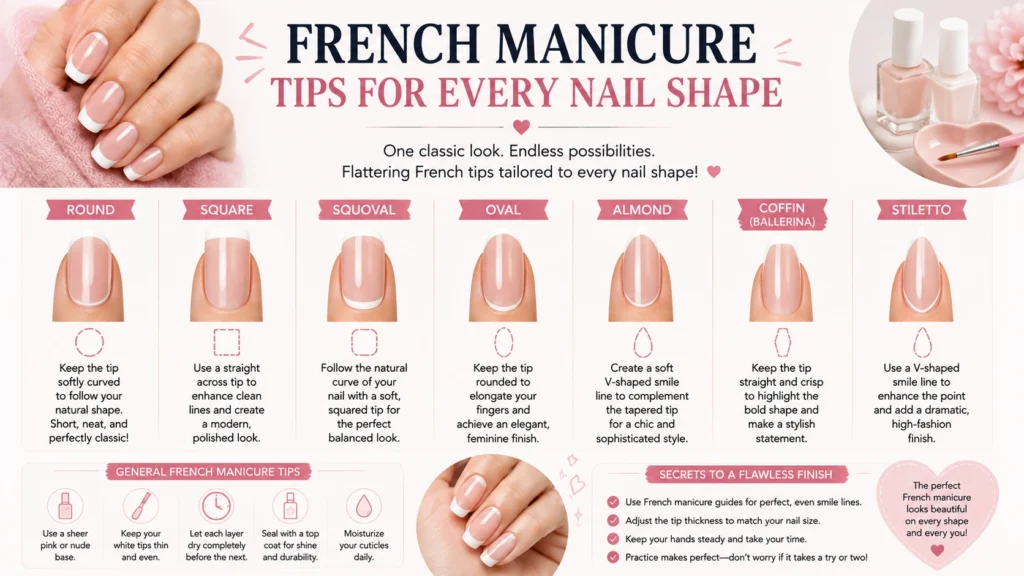
French Manicure Tips for Every Nail Shape
Short Nails
A very thin, barely visible white tip elongates short nails. Use thinner guides and keep the band narrow, 2–3mm. A nude base very close to skin tone makes the nail look longer.
Long Nails
A more pronounced white band looks proportionate on longer nails. A 4–5mm tip with a slightly more opaque white creates a classic, bold finish.
Almond and Oval Shapes
Follow the natural curve of the nail for the tip, a straight line looks unnatural on curved nail shapes. The freehand method is particularly suited to these shapes. Once your manicure is complete, pairing it with naturally flawless skin using these tips to Cover Blemishes Naturally can create a polished, everyday beauty look.
Final Thoughts
The French manicure rewards patience and practice. The first attempt rarely looks perfect, the guides help enormously for beginners, and the acetone clean-up step transforms an approximate result into a precise one. By the fifth attempt, the technique becomes genuinely easy and the results professional.
Frequently Asked Questions
Q: How do I get a perfect white tip on a French manicure?
A: Use a nail guide or striping tape placed just below the nail tip to create a clean, straight guide line. Paint the white polish in one confident stroke, remove the guide while still wet, and touch up edges with a small brush dipped in acetone. Patience and a steady hand improve with each practice session.
Q: Can I do a French manicure without nail guides?
A: Yes, practice freehand by resting the brush against the nail at the tip line and using the side of your finger for support. Many professionals work freehand. It takes more practice but produces a very natural result because you can follow the natural curve of your nail.
Q: What is the best white nail polish for French tips?
A: A true bright white with a slightly opaque formula gives the most classic result. Essie Blanc, OPI Alpine Snow, and Sally Hansen Hard as Nails in White are consistently recommended. Avoid very sheer whites as they require many coats.
Q: How do I stop the white tip from chipping?
A: Always use a gel or strengthening base coat, seal the tip edge carefully with top coat (this is called capping the tip), and apply a fresh layer of top coat every 2–3 days to extend wear.
Q: Is a French manicure appropriate for work?
A: The French manicure is one of the most professionally appropriate nail looks available. The clean, natural-looking design is universally accepted in professional settings. It is also appropriate for interviews, formal events, and any occasion requiring polished grooming.